Inserting Distribution Equipment
Insert distribution equipment from the Revit model onto the single-line diagram.
Start in the SINGLE-LINE DIAGRAM drafting view.
Insert UTIL from the Model
-
Run the
ElectroBIM Single-Line→ command. The Insert Distribution Equipment dialog box will open.Insert Link
-
Set Tree ☰ to UTIL.
-
Set Single-Line Diagram Graphic ☰ to Utility Transformer.
-
Press the button to close the dialog box.
-
Insert the transformer on the drafting view.
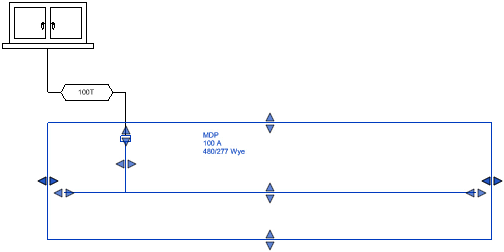
Insert MDP from the Model
-
Run the
ElectroBIM Single-Line→ command. The Insert Distribution Equipment dialog box will open.Insert Link
-
Set Tree ☰ to MDP.
-
Set Single-Line Diagram Graphic ☰ to Switchboard, Horizontal, Fed from Top.
-
Press the button to close the dialog box.
-
Insert the panel below UTIL on the drafting view.
-
Select panel MDP and use the grips provided to extend the right side of the graphic.

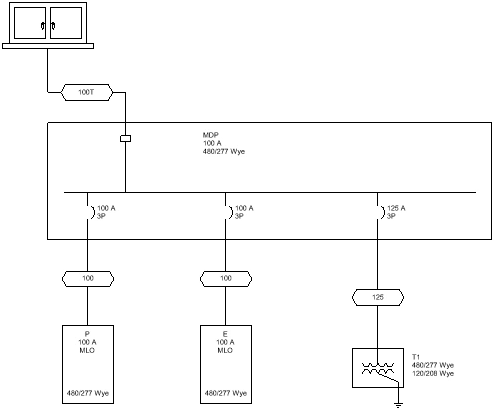
Insert P, E, & T1 from the Model
-
Run the
ElectroBIM Single-Line→ command. The Insert Distribution Equipment dialog box will open.Insert Link
-
Set Tree ☰ to P.
-
Press the button to close the dialog box.
-
Insert the panel below panel MDP on the drafting view.
-
Run the
ElectroBIM Single-Line→ command.Copy Link
-
Select panel P on the drafting view. The Select Distribution Equipment to Link dialog box will open.
-
Set Tree ☰ to E.
-
Press the button to close the dialog box.
-
Insert the panel to the right of panel P on the drafting view.
-
Run the
ElectroBIM Single-Line→ command. The Insert Distribution Equipment dialog box will open.Insert Link
-
Set Tree ☰ to T1.
-
Press the button to close the dialog box.
-
Insert the transformer to the right of panel E on the drafting view.

Insert Branch Circuit Devices
-
Open the FIRST FLOOR POWER floor plan.
-
Run the
ElectroBIM Single-Line→ command. You will be prompted to select a device from the model.Insert Link
-
Select the elevator motor on the floor plan. You will then be prompted to select a drafting view.
-
Press ESC. The Select Drafting View dialog box will open.
-
Set Drafting View ☰ to SINGLE-LINE DIAGRAM.
-
Check the box next to ☐ Set as default single-line diagram view.
-
Press the button. The Insert Distribution Equipment dialog box will open.
-
Press the button to close the dialog box.
-
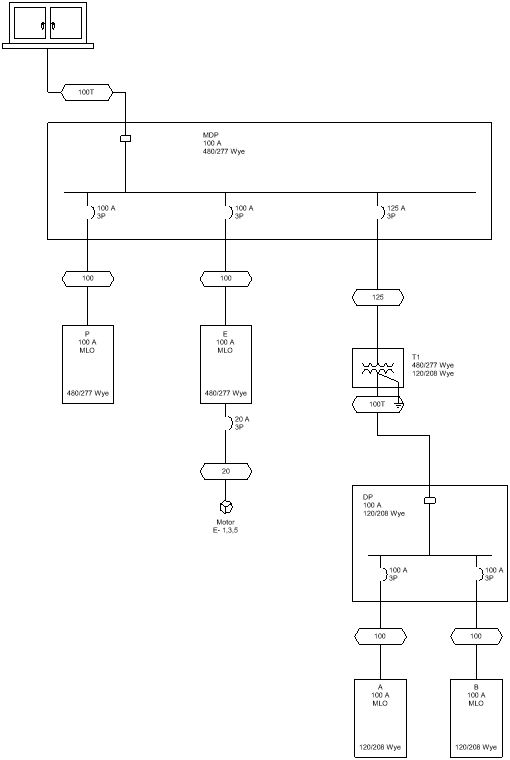
Insert the motor below panel E on the drafting view.
Generate the Rest of the Single-Line Diagram
-
Run the
ElectroBIM Single-Line→ command. The Generate One-Line dialog box will open.Generate One-Line
-
Perform one of the following actions:
- Set Tree ☰ to T1, then press the button to close the dialog box.
- Press the button to close the dialog box, then select transformer T1 on the drafting view.
The remaining distribution equipment from the model will be inserted on the single-line diagram.
