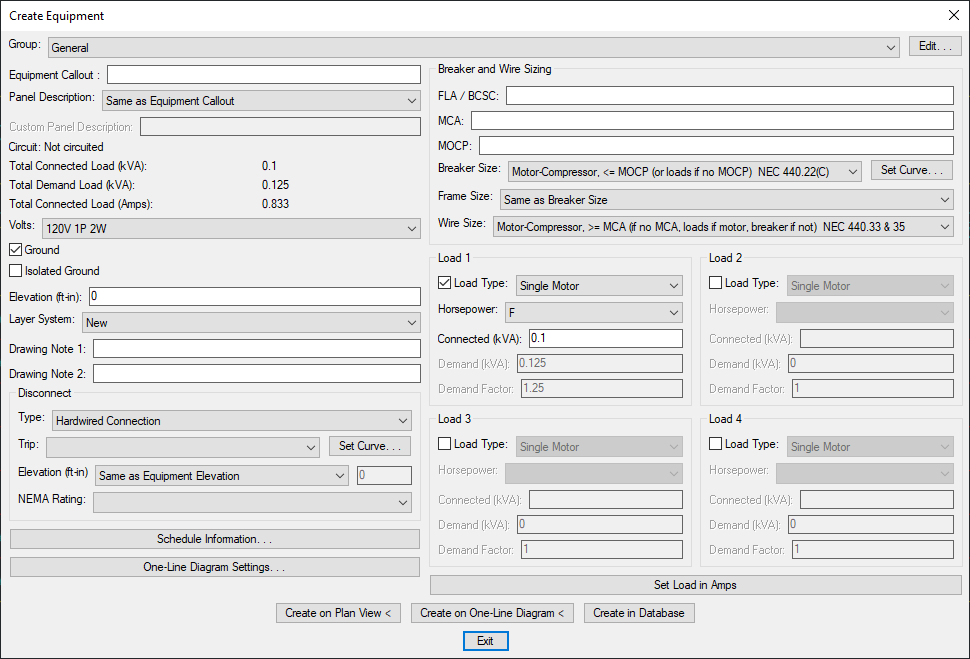
Create Equipment
To create equipment to place on the drawing or save in the project database, go to
Ribbon: Create Equipment
Pulldown Menu:
Create Equipment Dialog Box

See the Common Equipment Information section for more information about the values in this dialog box.
Creating Equipment on the Plan View
To create a piece of equipment to be added to the plan view, enter the information into the various fields of the dialog box and press the button.
You will be prompted to insert the piece of equipment on the drawing.
Specify insertion point:
You will then be prompted for the rotation angle. If the equipment block is not able to be rotated, this prompt will be skipped.
Rotation angle <0>:
If the equipment has a disconnect block, you will then be prompted to insert the disconnect on the drawing.
Specify insertion point:
Rotation angle <0>:
You will then be prompted for the location of the equipment callout.
Right-click or press space to toggle the leader on or off, press enter to place the callout.
See the Inserting Notes and Leaders on the Drawing section for more information about inserting the callout.
Creating Equipment on the One-Line Diagram
To create a piece of equipment to be added to the one-line diagram, enter the information into the various fields of the dialog box and press the button.
You will be prompted to insert the piece of equipment on the drawing.
Specify insertion point:
The equipment will be inserted on the drawing.
Creating Equipment in the Database
To create a piece of equipment in the database without inserting it on the drawing, enter the information into the various fields of the dialog box and press the button.
The equipment will be added to the database and the following dialog box will appear.
Equipment callout: Sets the default information displayed in the equipment callout.
Insert 3D blocks on drawing: Sets whether a 3D block is inserted on the drawing along with the 2D block.